
1. DIY: Lipstick or cream blush (using pigments) - adjusting beauty

- pigments (I used Essence pigments)
- beeswax
- oils (I used sweet almond oil)
- butters (I used mango butter)
- Vitamin E oil (optional )
- heat source (I used a candle)
- pot or spoon, in which you will melt everything together
- old lipstick, lip balm tubes or any small container
- (I used plastic lip balm containers, which I bought on Ebay)

 |
| Pigments form left to right: 13 paparedzzi, 12 miss piggy's lollipop, 06 WOW it's orange! |
will make it stick to the lips and solidify, oils will make it glide
on (plus vitamin benefits) and butters will make it glide on as
well and help it to solidify.
The measurements are:
The more pigments you add, the more pigmented and therefore drier it will be
The less pigments you add, the more sheerer it will be
The more beeswax you add, the more sold it will be, therefore hard - harder application
The more butters you add, the more silkier the application it will be, also greasier
The more oils you add the more sheer it will be - therefore not very long lasting
My measurements:
- my ration is: 1/2 : 1 : 1 (I used half a teaspoon of beeswax, one teaspoon
of oils and butters and one teaspoon of pigments)
- to make one very pigmented lipstick I used: 1 and 1/2 teaspoon of beeswax,
3 teaspoons of oils and 3 teaspoons of pigments = this is a very pigmented,
solid lipstick, which is long lasting, but also more drying on the lips
- to make one sheerer lipstick I used: 1 and 1/2 teaspoon of beeswax, 3 teaspoons
of oils, 1 teaspoon of butter and 3 teaspoons of pigments
- to make very sheer small cream blush I used: 1/2 teaspoon of beeswax,
1 teaspoon of oils and 1 teaspoon of pigments
- to make the product last at least a year you can add a few drops of Vitamin E oil,
which is a natural preservative
 |
| Very pigmented lipstick |
 |
| Sheerer lipstick |
- pigments differ between different bands. For some you may need to add
a lot (like Essence) to get it really pigmented, for some you may need to
add just a pea-sized amount
- matte pigments will make the lipstick more opaque then pigments, which
contain shimmer - those will make sheerer lipstick
- butters differ - some are more buttery than others, so you will need to take
that into account while making it
You can play around if you have any pigments lying around the house.
I am sure you have oils in your home that you can use (like olive oil
or coconut oil) and even some butters (cocoa butter or coconut butter).
I am sure you have oils in your home that you can use (like olive oil
or coconut oil) and even some butters (cocoa butter or coconut butter).
How to make it:
- I recommend melting the beeswax first, then butters, then oils and at the end,
adding pigments.
- You can melt it in a double boiler, or if you are making smaller quantities, just
use a candle and hold a metal spoon on top of it
- If you will pour it into lipstick containers, then I recommend stirring all the time,
after you have melted it down. Hold it away from fire and when you see it
getting a bit solid, then pour it into container.


So, these are my lipstick / cream blushes. Because you all know, lipstick can
be used as blush, anyway. This is a 2-in-1 product for me. I even think those
new cream blushes from Essence have the same texture as my home made sheer lipstick.
be used as blush, anyway. This is a 2-in-1 product for me. I even think those
new cream blushes from Essence have the same texture as my home made sheer lipstick.
The lipsticks are very pigmented, therefor they may stain your lips and
cheeks. I would recommend using natural oils or oil based cleansers
to get them off the skin completely.
cheeks. I would recommend using natural oils or oil based cleansers
to get them off the skin completely.

Other than that, those are pretty natural home made products
(except for the pigments :) ) and the whole fun about it is, you can
mix pigments together and make your costume shades.
(except for the pigments :) ) and the whole fun about it is, you can
mix pigments together and make your costume shades.


With Elizabeth Arden Eight Hour Cream


With Elizabeth Arden Eight Hour Cream

2. Red: DIY Lipstick (gingerlymade)


I first started getting interested in DIY cosmetics maybe six months ago.
I started seeing other bloggers creating sugar scrubs, powders, and lotions.
I saw people selling their own cosmetics on Etsy. And I thought, how neat!
Who knew you could create your own makeup from natural sources?
Then I started reading about what cosmetic companies use to make
their products. It's gross. So, I'm not going to go into it, but it is worth a little research.
After that I knew I wanted to try making my own. I was pleasantly surprised at
how simple a good, moisturizing lipstick could be. You only need 3 ingredients
to create this lipstick:
how simple a good, moisturizing lipstick could be. You only need 3 ingredients
to create this lipstick:
Beeswax
Shea butter
Beet root powder
I tried using a tablespoon of each and it worked well, but I thought upping the
beet root powder to 1.5 tablespoons came out the best.
beet root powder to 1.5 tablespoons came out the best.
Put all ingredients in a small microwavable cup. Put in the microwave
for 15 seconds at a time. Stir in between microwaving so your ingredients
don't scorch. You can also do this over the stove. Your goal is to melt
down the beeswax and shea butter.
for 15 seconds at a time. Stir in between microwaving so your ingredients
don't scorch. You can also do this over the stove. Your goal is to melt
down the beeswax and shea butter.
Once it's all melted and blended together, pour into a small container.
I found these 1 ounce jars at Michael's in the paint section. Let it cool
and you're done.
I found these 1 ounce jars at Michael's in the paint section. Let it cool
and you're done.

As much as I love the color red, it is my favorite color, I've never been
one to wear super red lipstick. It just doesn't complement my skin tone.
So, part of what I love about making my own lipstick is that it isn't over
powering.
In fact, it's more like a lip stain than anything. And I'm ok with that.
I don't need in your face kind of color.
one to wear super red lipstick. It just doesn't complement my skin tone.
So, part of what I love about making my own lipstick is that it isn't over
powering.
In fact, it's more like a lip stain than anything. And I'm ok with that.
I don't need in your face kind of color.
Now, this isn't commercial lipstick and it's not going to feel just like it.
It is incredibly moisturizing, but you may need a few applications before
you can really see the color.
It is incredibly moisturizing, but you may need a few applications before
you can really see the color.
So, although the jars contain a dark red color, what happens on your lips
is that it really just enhances your natural color. Perfect for me!
is that it really just enhances your natural color. Perfect for me!
But if you really like a darker color, you can always add more beet root
powder to darken it up.
powder to darken it up.

We loved this homemade lip & cheek stain! It looks great, such a pretty
natural shade. You make it as vibrant or subtle as you want depending
on how much you apply/how well you rub it in. I definitely reccommend
making some of this! So cheap, easy, and we found it comparable to
Benefit's Benetint.
natural shade. You make it as vibrant or subtle as you want depending
on how much you apply/how well you rub it in. I definitely reccommend
making some of this! So cheap, easy, and we found it comparable to
Benefit's Benetint.
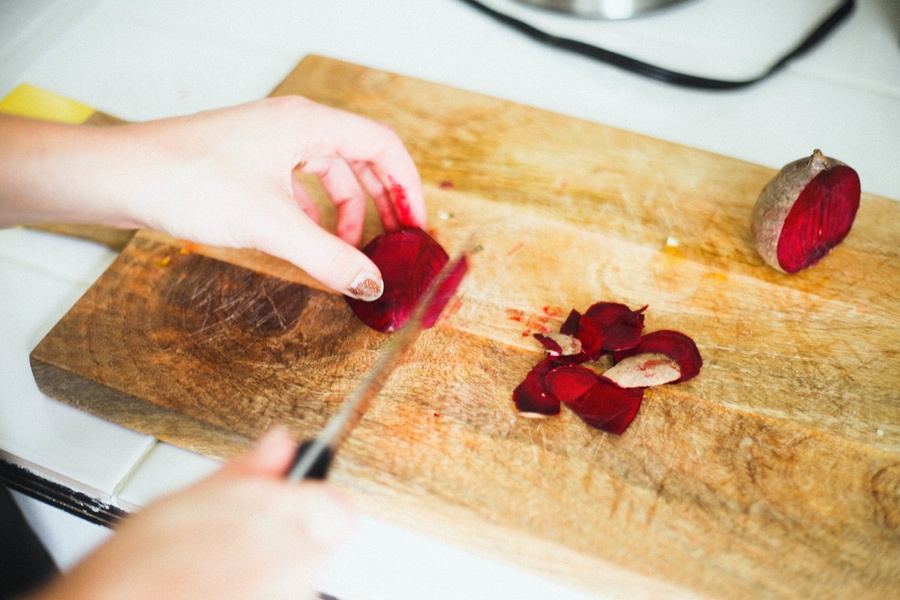
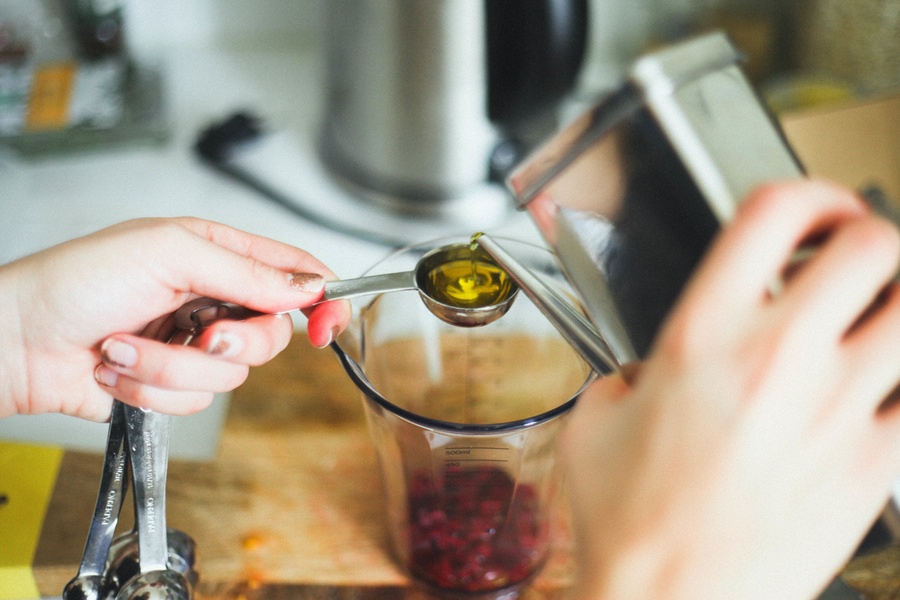
1 Beet peeled and chopped4 Tbs Olive Oil
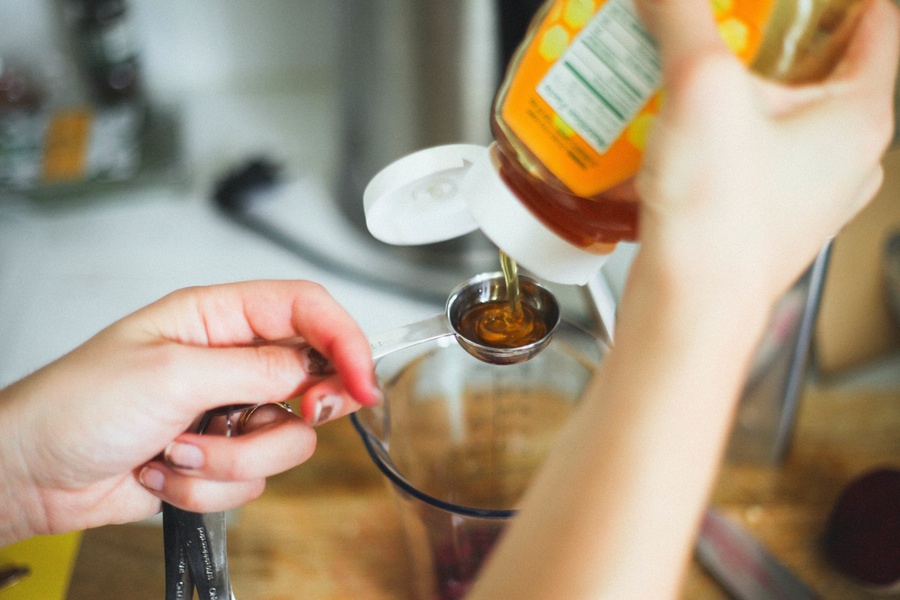
2 Tbs Honey
Mix ingredients together in a blender or food processor. Blend until smooth.
Apply to your lips, or rub into your cheeks, for a cute rosey glow.
Apply to your lips, or rub into your cheeks, for a cute rosey glow.
Keep it in your fridge for 1 month, or freezer for 2 months
4. DIY Tinted Lip Balm
(lezoemusings)
 You’ve probably seen some versions of this diy floating around the web. They are really sooo easy to make.
  I made lip balm two ways: one with a lipstick and the other with loose mineral blush. Petroleum jelly acts as the base (who doesn’t own this?).
  Rosebud is my absolute favorite lip balm.
 The blending part is easy. Put petroleum jelly and lipcolor/loose mineral blush into a small ziploc bag. Seal the bag. Mix (by rubbing the two products together) on the outside of the bag- your hands will stay clean!
 Once blending is done, snip the edge of the bottom corner and pipe the balm into a small container.
  So pretty and the colors are very subtle.
Beauty junkies, clean out your beauty junk drawer and give this easy but fun diy a try. They make great gifts for your loves as well.
5. 7 DIY Crayon Lipsticks to Make Now
You Will Need

• 1 whole crayon or a combo of one or more colors, equal to one crayon.
You can do 1/2+1/2, or 1/3 of three different crayons, 1/3+2/3 and so on.
• 1/2 tsp shea butter, available at Whole Foods
• 1/2 tsp any type of oil (olive, almond, jojoba, coconut). We used argan.
• Heat source. We used a candle.
• Large metal ladle
• Small metal spoon
• Container with a lid, such as a small empty lip balm jar, small
Altoids tin, empty contact lens case, etc.*
Altoids tin, empty contact lens case, etc.*
Optional• A drop or two of essential oil (we used grapefruit but
those with sensitive skin should use other non-citrus essential oils)
or extract (like vanilla or almond) for scent
those with sensitive skin should use other non-citrus essential oils)
or extract (like vanilla or almond) for scent
Steps

1: Choose your colors! You can pick one shade you like or mix it up
to a desired shade. (For this how-to, we picked Gold + Red Violet
and added some Lit Cosmetics Glitter in Liberace S2.)
to a desired shade. (For this how-to, we picked Gold + Red Violet
and added some Lit Cosmetics Glitter in Liberace S2.)
2: Remove the paper wrapping from the crayons.
3: Put your oil and shea butter, plus a drop or two of essential oil
if using, in the ladle first.
if using, in the ladle first.
4: Add your crayon(s). If using just one single color, break it into
pieces so that it melts more easily. If you’re mixing colors, you want
roughly one crayon worth total (half + half, 1 /3 + 2 /3 and so on).
pieces so that it melts more easily. If you’re mixing colors, you want
roughly one crayon worth total (half + half, 1 /3 + 2 /3 and so on).
5: Hover the ladle over a lit candle (about 3 inches away from the flame)
and carefully add in your ingredients.
and carefully add in your ingredients.
4: Crayons will begin to melt in about 30 seconds. As it melts, slowly stir
until all ingredients using a metal spoon. Make sure all ingredients are
mixed together.
until all ingredients using a metal spoon. Make sure all ingredients are
mixed together.
5: Remove ladle from heat.
6: If adding glitter, stir it in right after you remove ladle from the heat.

7: Using your spoon, pour the mixture into your container. Do this this
extremely carefully, as the mixture will be very hot!
extremely carefully, as the mixture will be very hot!
8: Let it cool in the refrigerator for 15 minutes.
You can control the intensity of the finished product from more sheer
to full-coverage. Apply it with your fingers for a tinted lip balm look, or
use a brush and layer, layer, layer, for an opaque color.
to full-coverage. Apply it with your fingers for a tinted lip balm look, or
use a brush and layer, layer, layer, for an opaque color.
*You can also do this over a stove top, using a double-boiler, instead
of a ladle and candle flame.
of a ladle and candle flame.
**If you prefer yours in stick form, you can also buy any cheap lip
balm in a tube. First, empty it. To do that, twist so that the entire
stick of balm is dispensed, and pull off the product. Then twist the
tube all the way back to the down position. When you get to step 7,
use a metal funnel (will be hard to aim without this) and pour your
mixture into the tube. Cool in the fridge, and you’re done!
7 Must-Have Colors!

The best part is experimenting with color! With a 64-pack of Crayolas,
we mixed several custom shades. Here are our favorite combos we
came up with!
we mixed several custom shades. Here are our favorite combos we
came up with!
• (pictured top, in how-to): 1 part Gold + 2 parts Red Violet
+ Lit Cosmetics Glitter in Liberace S2
+ Lit Cosmetics Glitter in Liberace S2
• (above, left, on model): 1 part Melon + 1 part Magenta
• (in compact, clockwise from top left): Sea Green
+ Turquoise Blue, Red Orange + Wild Strawberry, Wisteria
+ Mauvelous, Bittersweet + Peach, Silver + Violet, Magenta
+ Melon. Each of these was a 1:1 ratio.
+ Turquoise Blue, Red Orange + Wild Strawberry, Wisteria
+ Mauvelous, Bittersweet + Peach, Silver + Violet, Magenta
+ Melon. Each of these was a 1:1 ratio.
One final idea: pour your crayon lipstick into a locket!
6. D.I.Y. YUMMY LIP

photos + post by amy nadine, graphic design by eunice chun
I didn’t invent this delicious lip stain from heaven, but thought with
Labor Day weekend around the corner, what a perfect time to
remind you of it! When you’re throwing your barbeque, don’t forget
Kool-Aid’s REAL purpose… to stain your lips of course! It really does
work and last. Here’s how:
Labor Day weekend around the corner, what a perfect time to
remind you of it! When you’re throwing your barbeque, don’t forget
Kool-Aid’s REAL purpose… to stain your lips of course! It really does
work and last. Here’s how:
STEP ONE: Pick your flavor using this guide (or mix a couple to find
your perfect hue):
your perfect hue):
- Cherry = orange red
- Tropical Punch = bright red
- Peach Mango = peach
- Pink Lemonade = Barbie pink
- Strawberry Kiwi = light red
- Grape = purple
I poured it into a little bowl but you can merely use the packet as your
container!
container!
STEP TWO: Dampen your finger (our lovely model Carissa licked
hers but I don’t want to sound unprofessional, lol!). Press your finger
in the powder to pick up one coat.
hers but I don’t want to sound unprofessional, lol!). Press your finger
in the powder to pick up one coat.
STEP THREE: Rub your finger all over your lips. Try not to eat it
immediately like we did; it is sooo hard because it’s so good!
immediately like we did; it is sooo hard because it’s so good!
STEP FOUR: Dampen a Q-tip to go back over it and smooth out
any clumps or uneven edges.
any clumps or uneven edges.
Your honey will enjoy it too!
Không có nhận xét nào:
Đăng nhận xét